
Simple Winter Cowl ~ Free Pattern

A WordPress Exclusive Free Pattern!
This design happened because of a need for a quick to make and useful Christmas gifts. I had come across the Waistcoat Crochet Stitch on Pinterest a couple of years ago and liked the look of it; like a knitted stockinette stitch, but not, it’s not Tunisian either, just a simple single crochet, but worked differently. From what I read, it is a vintage crochet stitch come back. It is also known as the Center Single Crochet and the Crochet Stockinette Stitch. The Waistcoat Stitch makes for a nice warm fabric using worsted or aran weight yarn when finished. It is much easier than it looks, but it does require a loose tension and using a tapered crochet hook helps too. I paired it with the 3rd Loop Half Double Crochet and it added some fun textured stripes within the stockinette look of the Waistcoat Stitch.
This pattern is written for one size, but because it is worked in a multiple of 1, it is very easy to size up or down to fit anyone from child to adult.
I do plan on getting better photos once I can get some one to model it for me.
Simple Winter Cowl


Difficulty:
Easy, but not for beginners
Sizes:
One Size, approx. 24 inches circumference and 8 inches long
Materials:
6.00mm hook
1 skein of Caron Simply Soft for single color cowl
2 skeins of Caron Simply Soft (color A & B) for 2 color cowl (optional)
Stitches used are in US terminology
Terms used with abbreviations:
ch – chain
fsc – foundation singe crochet
sc – single crochet
wcs – waistcoat stitch
hdc – half double crochet
slst – slip stitch
st(s) – stitch(es)
Gauge:
Working the Waistcoat stitch in the round (see special stitches below):
For gauge swatch, fsc 30, join in 1st fsc with slst
rnd 1: ch1, sc in 1st st and in each st around, join with slst in 1st sc
rnd 2 – 20 : ch1, ch 1, wcs in same st as joining and in each st around, join with slst in 1st wcs
7 sts and 10 rnds = 2 inches, if your gauge is a little bigger, that’s ok.
Keep tension loose, may go up a hook size if tension is still to tight with the 6.00mm hook to work the wcs. Working with a tapered hook also helps.
The Waistcoat Stitch in the round will slant a bit.
Special Stitches:
Waistcoat Stitch (wcs): insert hook in between the “legs” of the stitch indicated in the previous row, yo, pull through stitch loosely (2 loops on hook), yo, pull through both loops. (on the front of the stitch (right side), the “legs” look like a V, on the back of the stitch (wrong side), the “legs” look like an upside down V. You will work between both, insert the hook into the front legs and out the back legs for working in the round)
(video tutorial on Moogly, but keep in mind the tutorial is worked flat, this project is worked in the round)


Finding the 3rd loop on a hdc: (video tutorial on Moogly for 3rd loop half double crochet)
 click to enlarge

Note: This pattern has not been tested. Please let me know if there is anything that is unclear. Thanks

Pattern
Note: Do not turn at the end of the rounds.
fsc: 75, join in 1st st making sure not to twist
rnd 1: ch1, sc in 1st st and in each st around, join with slst in 1st sc (75 sc)
rnds 2 – 5: ch 1, wcs in 1st st and in each st around, join with slst in 1st wcs (75 wcs)
rnd 6: ch 1, hdc in 1st st the same way as the wcs is made and in each st around, join with slst in the 1st hdc (75 hdc)
rnds 7 & 8: ch1, hdc in the 3rd loop in the back of 1st st and in the 3rd loop of each st around, join with slst in the 1st hdc (75 3rd loop hdc)
rnd 9: ch1, sc in the 3rd loop in the back of 1st st and in the 3rd loop of each st around, join with slst in the 1st sc (75 sc)
rnds 10 – 25: repeat rnds 2 -9 2x’s (75 sts)
rnds 26 – 29: repeat rnds 2 – 5 once (75 sts)
rnd 30: repeat rnd 1 (75 sc)
Finish off, weave in ends
For 2 colors: (optional)
change to color B when starting the hdc rnds (rnd 6), changing back to color A when starting the sc/wcs rnds (rnd 9) in the above pattern instructions.


Save in your Ravelry Favorites or Pattern Library
Copyright Jennifer Christensen.
©2016
Please do not post elsewhere or claim as your own.
A link back to this WordPress page is welcome and encouraged.
For any questions or problems with any of my patterns, please email me at:
midknightstarr@gmail.com

This work by Jennifer Christensen is licensed under a Creative Commons Attribution-NonCommercial-NoDerivatives 4.0 International License.
Sale of the written pattern is not allowed.
Cold Weather Wristies ~ Free Pattern
A WordPress Exclusive Free Pattern!
The cold weather is pretty much here in SE Michigan and I’ve already started wearing my winter coat and gloves. The one problem that I have, and it happens every year, is cold wrists. That ever present gap between the end of the glove and beginning of the sleeve of my coat. I try to pull the sleeve over the bottom of my gloves, but as soon as I have to move, my wrists end up becoming exposed again. In the past I have tried to squeeze my long fingerless mitts into my gloves, but it’s a tight fit and not very comfortable and the mitts are not large enough to be put on over the gloves.
Last night I decided to make just a pair of simple longish wrist warmers that start at my wrist and covers to just up under the sleeve of my coat and they work wonderfully!
For this pattern, I used the Foundation Half Double Crochet as the foundation and the 1st round combined. If you are not familiar with it, there is a wonderful tutorial over at Moogly with both a video and written/photo tutorials. I also use the 3rd loop half double crochet stitch, where there is another great tutorial over at Moogly also, if this is a new technique for you.
This is a very simple and quick to stitch pattern. I have written it for about a 7-7 1/2 inch circumference (slightly stretched) and it measures about 5 inches long, but you should be able to customize it fairly easily by adding or subtracting stitches in the first row before joining to work in the round for a larger or smaller circumference and you can also make it any length you would like.

Sizes:
One Size 7 – 7-1/2 in. circ. slightly stretched, 5 in. long
Materials:
4.50mm hook
Any 4/Worsted Weight yarn
Stitches used are in US terminology
Terms used with abbreviations:
ch – chain
fhdc – foundation half double crochet
hdc – half double crochet
slst -slip stitch
st(s) – stitch(es)
Gauge:
7hdc and 6 rows in half double crochet
Note: This pattern has not been tested. Please let me know if there is anything that is unclear. Thanks
Pattern
Do not turn at the end of the rounds. The beginning ch 1 of every row does not count as a stitch.
Foundation and Rnd 1: 25 fhdc, join with slst in 1 st made.
Rnd 2 – 10: Ch 1, hdc in the 3rd loop in the back of the same st as joining and in each of the sts around, join with slst in the top of 1st hdc of round. (25 3rd loop hdc)
Rnd 11 -15: Ch 1, hdc in same st as joining and in each of the sts around, join with slst in the top of the 1st hdc of round. (25 hdc)
Finish off, weave in ends
Save in your Ravelry Favorites or Pattern Library
Copyright Jennifer Christensen.
©2015
Please do not post elsewhere or claim as your own.
A link back to this WordPress page is welcome and encouraged.
For any questions or problems with any of my patterns, please email me at:
midknightstarr@gmail.com
This work by Jennifer Christensen is licensed under a Creative Commons Attribution-NonCommercial-NoDerivatives 4.0 International License.
Sale of the written pattern is not allowed.
More photos under the “read more”
New Pattern for Purchase!
It’s called Faerie Magic! Other than that, I’m not sure what to really call this. A cowl? Poncho? Hood? or even a Skirt? How about all 4 in 1!
Very quick and easy to make, using a 6.50 mm hook and a couple of skeins of the Red Heard Boutique Magical Yarn, this accessory can be finished in just a day or 2!
It comes written for 3 sizes: Small, Medium, and Large.
Purchase it HERE, on RAVELRY, or CRAFTSY for $2.50.

A (Not So) Quick Note
Exciting things are happening here!
The actual main reason I am posting, is that very soon I will be making a very exciting announcement! Don’t want to spoil it right now, but it should be within a couple of weeks, so keep checking back! (Hint: It has something to do with one of my patterns!)
I’m still working on the eBook idea, and I took a bit of a break to “throw together” the Spiderweb Skirt by Josi Hannon Madera for my garb for the Michigan Renaissance Festival. I finished it in just a bit less than a week. It makes a wonderful underskirt for the Ren Faire garb, especially if the over-skirt is lifted a bit in the front.
 or lifted a lot 😉
 Sept. 10, 2015
I had made the Spiderweb Skirt about 5 years ago in cotton worsted, but I didn’t think about how much cotton will relax and “stretch” with wear, so the skirt ended up being too long, so I made ties to hitch up the front to keep my feet from getting caught in the web lace. It’s still cool though, because then the back kind of drags like a train and it makes a fun underskirt for faire garb. It’s my fault though, I added 4 more rows for length when I just should have stopped at the written row count, taking the cotton fiber in consideration, making it in acrylic I added 3 more rows for length and it falls just to my ankle which is what I wanted. I love the feel of the cotton, though, after washing and wearing so much it gets really soft. When we went on opening day, I wore the cotton skirt, with my Hooded Dragon Scale Shrug, and a Dragon Shawl by Collette A. Perry around my waist. I received many positive comments about my shrug all day. I also crocheted the hat I’m wearing in the first pic. It’s made in size 10 cotton in a lacy pattern.

 August 22, 2015
I’m making one more Spiderweb Skirt in Midknight Blue and it’s almost finished. The skirt looks wonderful alone too, I like to wear tights or leggings under it. Very fun to wear! I really recommend this pattern, it’s a lot of fun to make and simple too.
Winter into Summer Hat?
I’m starting to get excited about this hat pattern I’m working on. I’ve been trying 4 different weights of yarn, 3 in cotton, 1 acrylic, for this hat that would be good for Spring, Summer, and Fall, then I thought why not try a wool blend for Winter? I think I might even have a skein of Lion Brand Wool Ease in worsted to use. One basic pattern, 4-5 different weight hats. With custom sizing, it could be for child through adult. Even though I think it would be a fairly simple pattern, there will be needed the basic knowledge of how to increase evenly working in the round for a flat circle, because even though I will have the first few rounds written out with where to place the increases, it will be up to the crocheter to continue the increases until the desired measurement is reached. There will be math involved also. I will have the equation where the crocheter will insert the desired head circumference to get the diameter needed before the decrease round is made, along with an example of how I got it for my small head. This will be a very slouchy hat, so it may seem huge at first, but it should turn out to be the correct size in the end.
The idea that is the Winter one will, of course, be heavier and warmer with the wool blend. Then the Summer one would be kind of lacy mesh-like, and a little bit snood-like, in a size 5 thread like Bernat Handicrafter Crochet Thread, weight category 0 lace acrylic thread, or any size 5 cotton thread, but it seems there is a lack of size 5 cotton crochet thread on the internet. I have a ball of Aunt Lydia’s Fast Five cotton crochet thread in my stash, but it seems to have been discontinued. I think size 10 cotton thread would be too fine of a thread for this project. The Bernat Handicrafter size 5 thread surprised me that it is an acrylic thread, because it has the look and feel of mercerized cotton, in my opinion. The nice thing is that it’s fully machine washable and dryable, unlike cotton thread. The lacy mesh-like-ness of the Summer hat would be nice, light, and breezy, and you could tuck long hair up into it like you would with a snood. Then there would be for Spring and Fall, maybe 2 different ones, like one for early-mid Spring/mid-late Fall when the weather is still on the cool side, but not as cold anymore/starting to get cooler/colder, but still on the, using a cotton, like Patons Grace which is a weight category 3 light cotton yarn, to mid-late Spring/early-mid Fall when it’s warming up/cooling down but still kinda on the warmish side, using a cotton, like Aunt Lydia’s Baker’s Cotton or Aunt Lydia’s Fashion 3, which are both a weight category 1 super fine cotton thread, in which the stitches would be slightly mesh-like due to using a hook that is about 5 or 6x’s larger than the recommended hook on the label, but still heavier than the Summer version. The Baker’s Cotton does seem to be just slightly heavier than the Fashion 3 though, but once I have hats made from both, I’ll be able to assess that better. I also think the neat part of this hat idea, no matter what season, not just Summer, is that it would be a good “bad hair day” hat. With the slouchiness of the main body and the fit of the band, you can tuck long hair inside of hat, just like you would do with a snood. My original hat that I made about 8 years ago, when I had very long hair, using the now discontinued yarn, Bernat Cool Crochet, I would tuck my hair up into it often. So, yeah, I’ve put a lot of though into the making of this hat.
Even though I will be writing the pattern with the ch3 at the beginning of each round to act as the first dc of each round, I highly recommend trying out the Chainless Starting Double Crochet to replace the ch3. Moogly has a great tutorial for this stitch that includes both video and pictures along with the written instructions. It took me some practice to master this stitch, but it is so worth it! It has changed my crochet life! The beautiful thing about this stitch when working double crochet in the round is that it makes the “seam”, where you start/end the rounds, practically invisible. I highly recommend this stitch for any project made using double crochet! Working flat? No more holes at the beginning of a double crochet row that you would normally get with beginning the row with a ch3. It is totally worth learning!
No photos until I get them all finished though 😀
Spring is Here!
It’s the 2nd day of May and the weather is finally warming up to spring temperatures! It will be nice to be able to go out in the sunshine and crochet again, but that will have to be after the spring cleanup after the mess winter left in our yard. My favorite, in both spring and summer, is going to the lake at my in-laws house and sitting outside on a sunny day, with a bottle of iced tea, my iPod, and my crochet project, under the trees looking over the lake.
 (Photo taken June 14, 2014)
Right now, I am in design mode again. A (hopefully) summery slouchy cotton hat. It’s actually based on a hat that I made (no pattern) about 7 or 8 years ago. I know I wrote it down, but I can’t find my notebook that I wrote it in, so I’ve been trying to recreate it from memory. I’m also trying different yarn/thread ideas for it for the look I want, because the yarn that I originally used, Bernat Cool Crochet, has been long discontinued. I think this might be kind of more of a “recipe” type pattern, because there will be some math going on in it for the crocheter to do to be sure of a good custom fit. I will have the start and the first few rounds written out, so then it will be up to the crocheter to be able to determine how many increase rounds total, by the diameter measurement that needs to be figured out at the start of the pattern, will be needed before the decrease to reach the needed size of the finished hat, then I will have how to decrease and the band/brim and finishing all written down. I would have all of the instructions on how to figure out the needed diameter and finished size. I’m also debating if it’s going to be a paid pattern or not. I hope to be getting many photos of all of the samples in the different yarn/thread ideas. I also told my husband that I need a “head” to be able to do that. I had found a Styrofoam “head” at Meijer, in their craft section, that I can pin cloth onto it I want.
I am also excited to say that my husband (ChaosRaven Cards) and I (by Midknight Designs) now have a showcase at Taylor Town Trade Center on Ecorse Rd in Taylor, Michigan! It’s not much at the moment, but right now I have a few crocheted items and he has a lot of Magic The Gathering cards set up for sale right now. I will be also putting in the case a few of my son’s crocheted roses, plus more of a selection of my crochet than what I have right now in the near future.


New Free Pattern!
I know it’s been awhile since I’ve updated. I have taken a break on the shawls to make hats for a family member. This last hat I am quite happy about and decided to write in down and share it.
It’s called Summer Bows Hat and you can find it for download Here, on Ravelry, or on Craftsy.


The Wristwarmers Adventure and Other Stuff
‘Tis the Holiday Season! It’s Snowing on WordPress!
I’ve been so busy crocheting what feels like tons of wristwarmers for everyone! It all started out as a request from my husbands cousin for a pair of wristwarmers after she had bought a pair at a craft bizarre when we were in Chicago.
But before I get into the story, I have to announce a new Free Pattern! Yes, it is another pair of Wristwarmers, called Diamond Tweed Wristwarmers, and you can download them for free HERE on WordPress, on RAVELRY, or on CRAFTSY! I also have a story behind these also, but I’ll get to that later 🙂
Faerie Blossom Wristwarmers – Free Pattern
Another WordPress Exclusive Free Pattern!
This came about because I really needed to take a break from thread crochet (aka my Grandmother’s shrug), and a relative had asked me about making her a pair of fingerless mitts (another story for another post). Then my husband bought me the book “Crochet Stitches Visual Encyclopedia”. It has over 300+ stitch patterns, edgings, and motifs. Over 250+ pages of inspiration!
In that book I came across the Fairy Shell stitch pattern and fell in love with it. It’s a variation of the [2dc, ch1, 2dc] shell stitch that seems so popular with the fingerless mitts/wristwarmers I’ve seen. I, right then, had to do something with it, of course!
The original stitch pattern is written flat, but it was very easy to translate it into the round. I also very slightly modified it to fit my needs for this pattern and the Faerie Blossom Wristwarmers were born!
This pattern has been designed for a snug fit. The stitch pattern is fairly stretchy and will conform to your hand. I also use the Foundation Single Crochet (FSC) instead of a foundation chain, because the FSC is much more elastic than the foundation chain. You can find a tutorial for the FSC HERE.
 Sample made in size Small/Medium
Sizes:
Small/Medium (6/7 inches)
Medium/Large (7/8 inches)
Materials:
4.00mm hook
Caron Simply Soft – 1 skein (I used Simply Soft Paints in Rose Garden)
Stitches used are in US terminology
Terms used with abbreviations:
ch – chain
sc – single crochet
dc – double crochet
slst -slip stitch
st(s) – stitch(es)
Gauge:
([sc, ch3, sc], [2dc, ch1, 2dc]) stitch pattern, as for the wrist/arm for the pattern – 4sc, 4dc, 7ch

Special Stitches:
Make Shell:
in stitch or space indicated make [2dc, ch1, 2dc]
Make 2chShell:
in stitch or space indicated make [2dc, ch2, 2dc]
Note: This pattern has not been tested. Please let me know if there is anything that is unclear. Thanks 🙂
Pattern:
Note: X = desired end rnd count. I’ve made this so you can choose your desired length of the wrist warmer. Make sure to make note of the total rnd counts for the 2nd wrist warmer.
Wrist/Arm
Tip: I suggest trying on the wrist/arm after a few rows. If it is too snug for your liking, I suggest replacing all of the Shells in the wrist/arm with the 2chShell, then work the thumb and hand as written. If it is too loose, go down a hook size.
FSC 24 (30), join in circle without twisting
Rnd 1: in same st as joining, ch1, [sc, ch3, sc], skip 2 sts, make Shell in next st, skip 2 sts, ([sc, ch3, sc] in next st, skip 2 sts, make Shell in next st, skip 2 sts) around. Slst in 1st sc, slst into ch3 space.
Rnd 2: ch4, 2dc in ch3 space, [sc, ch3, sc] in the ch1 space of the next Shell, (make Shell in the next ch3 space, [sc, ch3, sc] in the ch1 space of the next Shell) around, dc in the same ch3 space as the beginning ch4, slst in the 3rd ch of the ch4, slst in the next ch1 space.
Rnd 3: ch1, [sc, ch3, sc], make Shell in the next ch3 space, ([sc, ch3, sc] in the ch1 space of the next Shell, make Shell in the next ch3 space) around. Slst in 1st sc, slst into ch3 space.
Rnd 4 – X: Repeat rnds 2 & 3 until desired length for the wrist/arm, ending with rnd 3.
DO NOT FINISH OFF HERE
Thumb Shaping & Thumb Hole
Rnd 1: ch5, 2dc in ch3 space, [sc, ch3, sc] in the ch1 space of the next Shell, (make 2chShell in the next ch3 space, [sc, ch3, sc] in the ch1 space of the next Shell) around, dc in the same ch3 space as the beginning ch4, slst in the 3rd ch of the ch5, slst in the next ch2 space.
Rnd 2: ch1,[ sc, ch3, sc], make 2chShell in the next ch3 space, ([sc, ch3, sc] in the ch1 space of the next Shell, make 2chShell in the next ch3 space) around. Slst in 1st sc, slst into ch3 space.
Rnd 3: Left Thumb Hole: ch5, 2dc in ch3 space, ch5 LOOSELY, skip next 2chShell, (make 2chShell in the next ch3 space, [sc, ch3, sc] in the ch2 space of the next 2chShell) around, dc in the same ch3 space as the beginning ch4, slst in the 3rd ch of the ch5, slst in the next ch1 space.
Rnd 3: Right Thumb Hole: ch5, 2dc in ch3 space, [sc, ch3, sc] in the ch1 space of the next 2chShell, (make 2chShell in the next ch3 space, [sc, ch3, sc] in the ch1 space of the next 2chShell) around until the last [sc, ch3, sc] and Shell, make Shell in the next ch3 space, ch5 LOOSELY, skip next 2chShell, dc in the same ch3 space as the beginning ch5, slst in the 3rd ch of the ch4, slst in the next ch1 space.
Hand
Rnd 1: Left Wristwarmer: ch1, [sc, ch3, sc], make 2chShell in the 3rd chain of ch5, ([sc, ch3, sc] in the ch2 space of the next Shell, make 2chShell in the next ch3 space) around. Slst in 1st sc, slst into ch3 space.
Rnd 1: Right Wristwarmer: ch1, [sc, ch3, sc], make 2chShell in the next ch3 space, ([sc, ch3, sc] in the ch1 space of the next 2chShell, make 2chShell in the next ch3 space) around until the [sc, ch3,sc] before the Shell before the ch5, [sc, ch3, sc] in the ch1 space of the next Shell, make Shell in the 3rd ch of the ch5. Slst in 1st sc, slst into ch3 space.
Rnd 2 – 5/X: Repeat rnds 3 & 2, replacing “make Shell” with the “make 2chShell” and ch5 at the beginning of every rnd 2 repeat instead of the ch4, until the desired length for the hand.
Finish off.
Save in Your Ravelry Favorites or Pattern Library
Copyright Jennifer Christensen.
©2014
Please do not post elsewhere or claim as your own.
A link back to this WordPress page is welcome and encouraged.
For any questions or problems with any of my patterns, please email me at:
midknightstarr@gmail.com
This work by Jennifer Christensen is licensed under a Creative Commons Attribution-NonCommercial-NoDerivatives 4.0 International License.
Sale of the written pattern is not allowed.


More photos under the “cut”
Dragon Scale Shrug Pattern now for Purchase!

You can purchase the PDF for download either HERE or on Ravelry for $5.00
This for the 15″, 16″, & 17″ shoulder to shoulder measurement sizes (small, medium, & large) only. The pattern for the Plus sizes, 18″, 19″, & 20″, are still in testing.

Dragon Scale Head Kerchief – Free Pattern
My first WordPress Exclusive Pattern!
This simple Crocodile Stitch Head Kerchief was something I promised myself that I would make for my daughter if I had yarn left from making her shrug. Well, I did and here it is. I thought I would share how I made this in pattern format and I though it could go hand-in-hand with my photo tutorial, Crocodile Stitch – Increases, if you are new to this technique.
This is actually easy to make, but it’s not really for brand new beginner crocheters, maybe advanced beginner, if you are familiar to working around the post of a stitch. For intermediate/advanced crocheters, this should be no problem at all to make.
Now also available in Knitsy Magazine Issue #25!

Size:
Adult One Size Fits Most – Measures 18″ from center of scale end to end of row 26 or about 42” including the ties
Materials:
4.50mm hook
Patons Lace in Sachet or any 2/fine weight yarn
Stitches used are in US terminology
Terms used with abbreviations:
ch – chain
sc – single crochet
dc – double crochet
slst -slip stitch
st(s) – stitch(es)
Crocodile Stitch – Increases – Photo Tutorial, if needed
Gauge:
(Click Thumbs for full size)


Special Stitch:
Make Scale:
Working around designated double crochet stitches, make 5dc around the post of the first dc, ch1, make 5dc around the next dc. Scale made.
Note: This pattern has not been tested. Please let me know if there is anything that is unclear. Thanks 🙂
Pattern:
Kerchief:
Row 1: ch3, dc in 3rd ch from hook.
Row 2: ch2, make scale around ch and dc.
Row 3: ch2, dc in same st, ch2, dc in center of scale, ch2, 2dc in end top corner dc on scale.
Row 4: ch2, make scale around 2dc just made, ch1, skip dc and ch2 spaces, make scale around next 2dc.
Row 5: ch2, dc in same st, ch2, dc in center of scale, ch2, 2dc in next dc and around ch1, ch2, dc in center of scale, ch2, 2dc in end top corner dc on scale.
Row 6: ch2, make scale around 2dc just made, ch1, skip dc and ch2 spaces, make scale around next 2dc, ch1, skip dc and ch2 spaces, make scale around next 2dc.
Row 7: ch2, dc in same st, ch2, dc in center of scale, ch2, 2dc in next dc and around ch1, ch2, dc in center of scale, ch2, 2dc in next dc and around ch1, ch2, dc in center of scale, 2dc in end top corner dc on scale
For all even rows, 8 through 26: ch2, make scale around 2dc just made, ch1, skip dc and ch2 spaces, [make scale around next 2dc, ch1, skip dc and ch2 spaces, make scale around next 2dc] repeat to end of row.
For all odd rows, 9 though 25: ch2, dc in same st, ch2, [dc in center of scale, ch2, 2dc in next dc and around ch1, ch2], dc in center of scale, 2dc in end top corner dc on scale.
26 rows = 13 scale rows. At the end of row 26, there should be 13 scales made.
If you need this a bit larger, just add another row or 2, continuing as established before beginning row 27.
Row 27: ch2, (wrong side facing) slst in the center of the first scale, ch1, sc in the same space. [ch2, sc in the center of the next scale], repeat to end, finish off.
Tie:
Row 1: ch40 loosely. With right side facing of the kerchief, join with a sc in the 1st sc of row 27 of the kerchief, [3sc in the next ch2 space, sc in next sc], across to end. ch41 loosely.
Row 2: turn, sc in 2nd ch from hook and in all sts across to end of the beginning ch40.
Row 3: turn, slst in every sc to end. Finish off.
Save in Your Ravelry Favorites or Pattern Library
Copyright Jennifer Christensen.
©2014
Please do not post elsewhere or claim as your own.
A link back to this WordPress page is welcome and encouraged.
For any questions or problems with any of my patterns, please email me at:
midknightstarr@gmail.com
This work by Jennifer Christensen is licensed under a Creative Commons Attribution-NonCommercial-NoDerivatives 4.0 International License.
Sale of the written pattern is not allowed.
More photos behind the “cut”
Much Crocheting, and Some Pattern Editing, Today
Working on my Grandmothers shrug, even though it’s only slightly modified in the sleeve to make it a 3/4 length instead of full length long sleeves, I still need to refer back to my written pattern for the Dragon Scale Shrug. I am now at the shoulder cap of the sleeve and I’m not happy with what I have written, so hence the editing. It’s a minor edit, but it was bugging me. I’ve got the 1st 2 rows (1 scale row) done of the shoulder cap, 16 rows to go. I’ve already had to frog the shoulder cap twice, but I think I got it right now.

I’m getting very anxious to get this written pattern completely finished and up for purchase! Soon, I hope! I think the smaller sizes will be out before the plus sizes though. I’m more confident on the pattern for the smaller sizes.
Nothing Really New, Yet
Well, I have 3 testers so far for my Daughter of Dragons Shrug, so I am now focusing on working on the shrug for my Grandmother, until I’m needed to do editing and stuff.
I have 10″ out of 15″ for the first sleeve done, 5 more to go, so there is a chance I may finish that tonight. Then I’ll work of the back and then the second sleeve after that. This shrug is actually working up faster than the 3 I previously made lol
This shrug I’ve modified a bit though, because I have it written for long sleeves (up to 20″ long) and she wants 3/4 length sleeves, so that could explain why it’s taking less time.

Last night, my husband went to a MTG booster draft at one of the local game stores and used his new pouch for the first time. When he came home afterward, it was filled with cards! He said he got a lot of comments on it from some of the other players last night too. I couldn’t get over how many cards he fit into it! LOL

I was also thinking that I should make up a bunch of necklaces for “ready to ship” for hopefully holiday sales too. I think I want to make at least a couple of the necklaces and a bracelet or two in the gold metallic thread I have.
New Tutorial for the Amigurumi Adipose

The Tutorial is for the Fingers and Toes Only for the pattern.
Right now I have the one for the finger/hand competed and up, soon the toes will be added.
Lots of photos!
The Pattern for the Amigurumi Adipose can be found HERE
The Tutorial for the Fingers can be found HERE
Check back soon for the Tutorial for the Toes.
Toes Tutorial can now be found HERE, under the Fingers Tutorial!

Raven’s Dragon Skin Pouch
Completely finished!
I do have to say that I totally suck at lining a bag! Sewing is definitely not my strong point at all! I have sewn things over the years, hand-sewn, machine-sewn (my sewing machine broke down a few years ago), made things from fabric with sewing. I even had a sewing class waaayyyyy back in junior high! I can do it, but no matter how careful I am, it always looks messy. I try to make neat and even stitches, but it just does not happen. *sigh*
Annnnnyyyyyy who. Raven’s pouch! I am pretty happy with the way it turned out, despite the sloppy lining. He’s happy with it and that is all that matters. It’s going to be the home for a deck of MTG cards, dice, and tokens.
I do have to point out (again) that he chose the yarn, fabric, and button for this. He was quite pleased that it ended up turning out to have all 5 colors from Magic the Gathering incorporated into the bag. The yarn is green with blue metallic, the drawstrings are blue satin ribbon, the button is red, and the fabric is black with white and red in it 🙂


The written pattern is also ready for purchase: Lapis Dragon Skin Pouch
Busy Weekend!
First of all, New Theme! I updated my WP look. I liked my old theme a lot, but I’ve had it for quite awhile now and I really needed a fresh new look. I really like the look of this theme, a lot. One day I may change the background image if I find something else I like, but for now, there is just something I like with the default background that came with this theme.
Second, Tutorials! I have 4 tutorials up that I did this weekend, all having to do with the Crocodile Stitch, all in one place! You’ll find the Basic Stitch, Making Increases to make that “triangle” shawl-look or a head kerchief, “In the Round”, and with a Solid Foundation. All with lots of photos. They all can be found on my new Tutorial page! Next I will be making “pattern specific” tutorials, mainly for my Amigurumi Adipose. Over the years, there have been many, many questions about the hands and feet, and even though I have rewritten and updated the pattern recently, I think a couple of photo tutorials might help also. I am also asking if there is anything anyone would like to see me make a tutorial for. If there is anything, comment or email me and I’ll see if it’s something I’m able to do. One thing I cannot do is make video tutorials. I do not have the set up, equipment, nor the video editing programs, to make them. Also, if there are any good tutorials elsewhere that I can link to on my Tutorial page, leave me a link in the comments here, or on the page, and I’ll add it to the list.
I have written the pattern for my husbands Dragon Skin Pouch, but it still needs photos taken. I still need to get him over to JoAnns to pick out fabric for the lining and a button he likes, too. Once that it done, the pattern will be posted for purchase. I did start making another pouch for myself in Lion Brand’s Vanna’s Glamour Sapphire. It’s my new “purse project” for when I’m on the go and have those unexpected wait times.
In middle of all of this, I am working on my Grandmother’s shrug, working with my testers to get the Dragon Scale Shrug up for purchase, and looking for new testers for my Daughter of Dragons Shrug. Right now, I have some of the info in THIS POST, but I plan on making a new post specifically with all of the info needed very soon, if not right after I finish writing this post. So keep a look out for that if you are interest, or you could message me on Facebook, or email me with any questions about the testing.
I’ve been busy!
Post #100! WOO HOO! 😀
I have finally finished my daughters shrug and it has been delivered to her! She loves it! I can not wait to get photos of her wearing it 🙂
The pattern for it, Daughter of Dragons Shrug, is also finished being written and I have the 1st half ready to go out to be tested. More info for testing can be found on THIS POST.


I have also written a pattern for wristwarmers that are based on the Daughter of Dragons Shrug. I think they are cute and fun, too. Something to dress up a plain pullover or something. I have it posted and ready for purchase! Check out my Honeycomb Dragon Wristwarmers!


Not only have I completed those in the last couple of weeks, I have also finished my husbands Dragon Skin Pouch, I even have a pattern written up for it. The pouch still needs a fabric lining yet, and I still need to get photos of it, so no pics to share for this project yet.
I’ve also done a bit of “nitpicking” editing on my Dragon Shrug patterns over the last few days. Still waiting on more input from my testers, especially for the Plus sizes.
Now that I have those projects out of the way, I can concentrate on working on my Grandmother shrug. Still no photos for that yet, either.
Finishing and Beginning
I have finished the dice bag order for my friend. The original order was for 2 small bags and 2 large, but he added on for another large,and will be picking them up on Saturday. I sent him this photo and he seems happy with them.

I also squeezed in an additional project, I made a necklace for my best childhood friends upcoming 45th birthday. It’s made from my Isabeau pattern. I hope she likes it 🙂

I’ve also been working on Keely’s Daughter of Dragons Shrug. I’m about halfway done with the second sleeve, then comes the seaming, the neckline, and the wrist-lace to match the 1st sleeve. The lace that will be on Keely’s will not be in the pattern for the shrug, she chose it from a pattern online that she liked. The lace I will be including in the pattern will be a simple honeycomb openwork design that I thought worked well with the scales of the shrug. (info for testing this pattern in THIS POST)
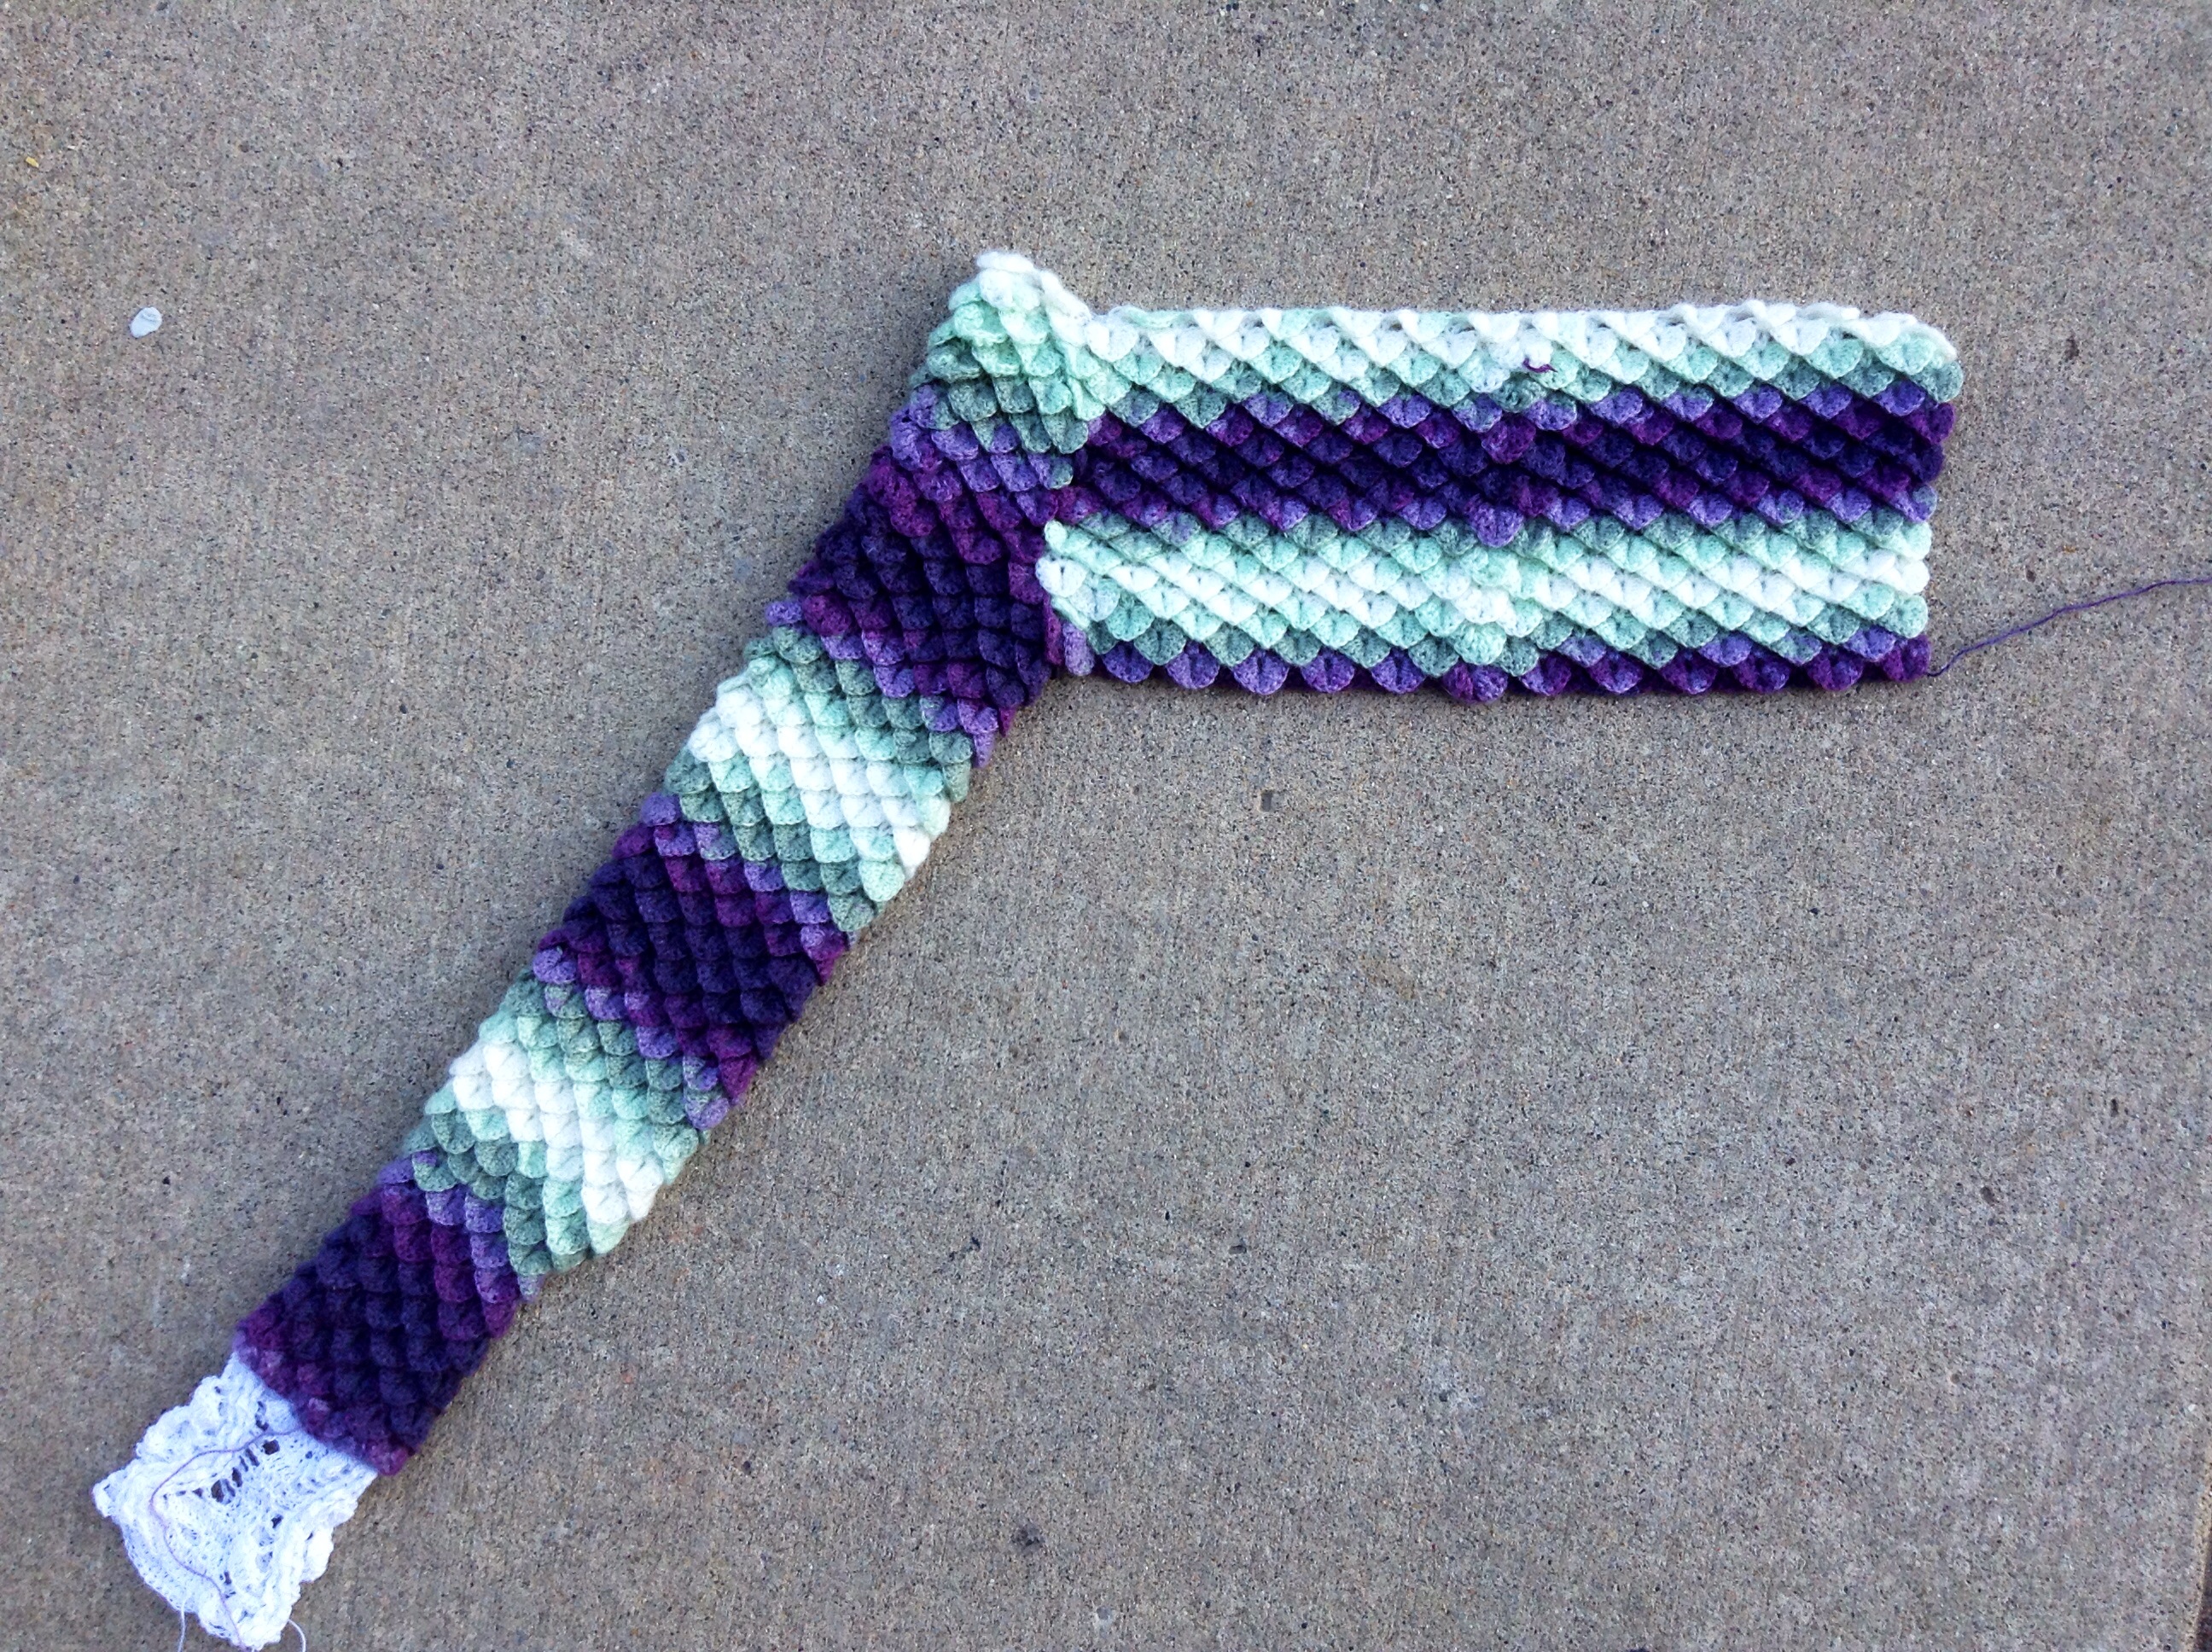
Keely’s chosen wrist-lace
 ~*~
~*~
Wrist-lace for the written pattern

I am still working on my grandmothers shrug too, but I haven’t any photos of that yet. Her’s will be a modified version of my original Dragon’s Scale Shrug. She wears a 16″ back, but wants looser “large” sleeves that are 3/4 length, in tan size 10 thread.
I also have a barrette order to make yet. Another friend of mine ordered it as a Yule gift for another friend of hers. I pre-purchased a wide black barrette for which I will be crocheting small thread snowflakes and gluing them to the barrette.
Still working on Raven’s Dragon (Scale) Skin Dice bag. It’s my “Purse Project”, I keep a wrist pouch with the project in it in the backpack style bag that I use as a purse that I take everywhere with me. I’m making it in Lion Brand’s Vanna’s Glamour in the Lapis (dark greenish teal with sapphire blue metallic) colorway. It’s very sparkly and shiny, so it doesn’t photograph well. I’m thinking about writing this pattern too when it’s finished. This one is going to be rather large, I’m almost done with 1 ball (202yds) of the yarn and I just bought a second to be able to finish it. I think he might want to be able to fit a deck box (Magic: The Gathering) in it along with his dice.

Yesterday, I was able to spend some of my yarn allowance and got 5 balls of Patons Lace Sequins in the Smoky Quartz colorway.

I want to make a shrug out of that for myself. I did up one pattern round in the Dragon Scale and, because of the sequins, I used the recommended hook size on the label and adjusted the stitch count for a size larger hook. The shrug is written for a size 3.25 hook for gauge, and the recommended hook is a 3.50, so it was easy to figure out. I think it’s going to be a cross between my original shrug and Keely’s shrug in design. I guess I’ll figure that out when I get to it. Now to put this aside for later when I have Keely’s shrug done and more on my grandmothers shrug done. I have a bad habit of needing a minimum of 2 project going at the same time.

Now on to a night of Crochet and MacGyver on Netflix 🙂
Daughter of Dragons Shrug Pattern
AKA: Keely’s Dragon Shrug.
*Please see THIS POST concerning testing for this pattern. Thank you.
Today, I’ve been doing some editing on what I have written so far for this pattern when I came up with the name. I kind of thought this was fitting as my own daughter helped me design this version from my original version, the Dragon Scale Shrug, which is a looser “older” looking shrug. This one is made to be snug, custom fitted to the wearer and can be embellished with lace at the wrist, chains, or anything that the young or “young at heart” can think of. This one I’m writing for only 3 sizes; 15″ (small), 16″ (medium), and 17″ (large) shoulder to shoulder back width. I’m sure an experienced hooker can figure out larger (or smaller) sizes using the gauge of the pattern as everything in this pattern practically needs the wearers measurements. I’m really close to finishing making the shrug, I’m working on the right sleeve in-between all of the other project I have going at the moment, some of them paying projects.
I will be needing testers for this pattern, so if you think you might have the time and are interested, please contact me either at my Facebook page, by Midknight or email me at midknightstarr@gmail.com
Details of the project is that knowledge of making the crocodile stitch is very helpful, but there are tons of tutorials online. I do have the stitch pattern written out before the actual shrug pattern to make a swatch and I will have reference photos, but it’s not a tutorial. I used Patons Lace but any size 2/Fine yarn that works in gauge will be fine. I have even used size 10 crochet cotton. The Patons Lace comes in 498yd balls so I think approx between somewhere around 2,oo0 and 3,500 yards depending on size should work. Then a 3.25 mm hook or size for gauge. I will probably send half of the pattern at a time, then at the end of the testing, I will give the tester the full ready for sale pattern.
At this time I only have a rough draft going and no finished project photos yet.


Amigurumi Adipose Pattern Update
The updated pattern is now up for free download. I (hopefully) fixed the stitch count/math problems and I have completely rewritten Rnd 9 of the arm/hand. I hope it’s more understandable now than it was. It seemed that the hand was the most problematic for many people as that was the subject of a lot of emails and messages I had received over the past 6yrs. I have also added a couple of photos of the hand and foot for reference. The pattern still has not been tested, so any errors still in it are mine, so please contact me if any are found. Thanks.
I also changed the name to Amigurumi Adipose from Amigurumi “Fat” Baby. I made the name change decision because of my pattern being featured on BBCAmerica.com 2yrs ago.
I am keeping open the Amigurumi “Fat” Baby FAQ & Errata page for all patterns downloaded before the update today.

About my Adipose Pattern
It’s not like I don’t have tons of projects that I have to finish already, but it seems that after 6yrs, I really do need to rewrite my Amigurumi “Fat” Baby pattern, which means I need to sit down and actually crochet it again. The original pattern had never been tested and I know more now about pattern writing than I did then.
I also found that I even had an error in my math in my errata post, which has now been corrected.
Such an Overwhelming Day!
I am so overwhelmed by the response I’ve gotten for the special on my shrug pattern! I’ve never been in the “front page” of the Pattern section on Ravelry, let alone in the “top 5 hot” patterns!
I still need to get this pattern tested so I can offer it in multiple sizes and someone on Ravelry suggested a few groups where I might find testers, but I found the groups very overwhelming and confusing. I understand the need for rules and regulations, I’m all for it, but there are quite a lot of them and so many of them confuse me, that I get nervous that I might inadvertently break one or many due to my confusion or misunderstanding. Some have required questions that I have no way of answering. For one, I haven’t any idea the approximation of the hours the project could take, I could give days, or even weeks, but not hours.
I also understand that I can’t really offer much for the testing time, just the completely sale-ready pattern, so I pretty much need volunteers for this.
I’m soon going to have a 2nd pattern to be ready for testing also. I’ve caught back up, and then some, after having to frog a bunch of it.
For info about testing the Dragon Scale Shrug, please visit THIS POST
Update: Dragon Scale Shrug Pattern
The actual writing has begun. I started writing out the rough draft today and I realize that some of the photos that I took for the pattern aren’t going to work, so I need to make new swatches and stitch examples to photograph for the pattern.
I’m thinking soon I will need testers for it and I’m hoping to get at least 1, maybe 2, people per size. Right now I’m planning on doing sizes ranging from small to x-large and so far I have 1 tester for the x-large size. If there is anyone interested please send me an email: midknightstarr@gmail.com for the details. Thanks 🙂
Isabeau Choker Pattern Sale
On sale now for 50% off. Was $3.00, Now $1.50

(photo ©Lindacee on Ravelry)
(earrings are *not* included in the pattern)


